I decided to have a go at etching my own board just for fun. Previously I'd done everything with perf-board, which works, but has definite limitations, especially as projects get larger and more complicated. Initially I'd been turned off etching boards because it sounded like a long onerous task involving dangerous chemicals and expensive equipment. Thankfully, there are cheaper avenues that from my first attempt seem pretty useful.
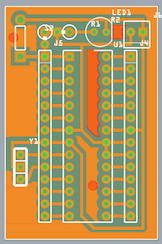
Step one involves designing a circuit to test. To do this I used Fritzing and designed a very basic Arduino-clone - nothing fancy, not even a LED for PIN 13 (sacrilege!).
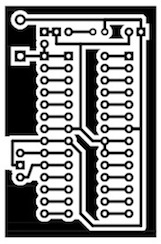
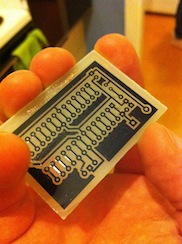
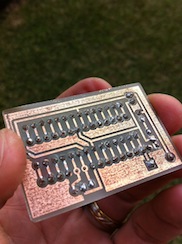
Next step is to export the PCB design from Fritzing and print the resultant image on a laser printer. You can use the expensive ($35/5 shets) Press-n-Peel, but I found that matte photo paper works great. Once printed I attached it to my copper board (standard Jaycar) securely (tape!) I then ran it through my laminator ($40/Aus Post) a few times! This bonds the laser toner to the copper. Wash the board in warm water to remove paper and you're left with a board that's ready to be etched!
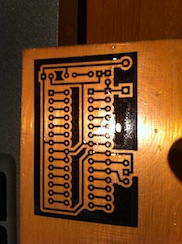
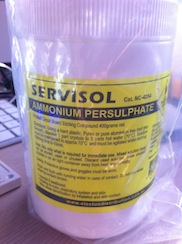
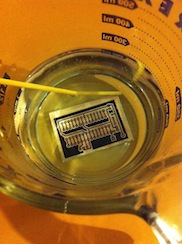
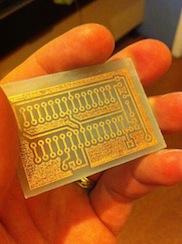
There are a few options for etching, but I used ammonium persulfate (Jaycar again). Mix it per instructions and place board in for 10 minutes or so, agitating all the while. After a few minutes you can see the copper start to disappear, and eventually it's all gone - apart from that protected by the toner! Then a little light scrubbing with solvent and the toner's gone too - leaving nothing but copper!
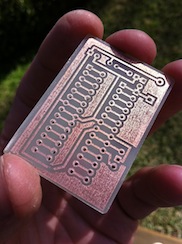
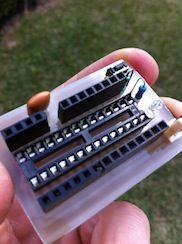
If one was using surface mount components that might be it - unfortunately through-hole components require a.. um.. hole! The tinsy tiny drill bits didn't fit in my drill press, so I had to go commando-style with a Dremel (wannabe). Thankfully it wasn't so bad as the etching leaves you with a decent start point for the drill in the centre of each pad, so a little concentration and about 15 minutes were all that was required to finish the drilling. Didn't manage to mangle a single pad in the process which was a bonus! Insert components, solder in place.
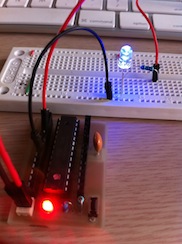
Final step - check all that effort actually produced something that works! I loaded the classic Blink program, hooked up a LED on a breadboard, applied 5V and ta-da!! Blickity blink blink!!
So in the end making your own boards is pretty straight-forward. None of the steps were particularly tricky, and using the method I chose didn't invole huge costs - and best of all - worked!
